Gear Reviews
Greenboy fEARful 12/6/1 Cube – A D.I.Y. Bass Cab Adventure
A D.I.Y. bass cab adventure in building my own Greenboy fEARful 12/6/1 Cube…

Background
I needed a compact, light weight, good sounding bass cabinet for some cool gigs where my 8×10 Fridge wasn’t welcome. After a good deal of research, I came across some discussions on Talkbass about a guy called “Greenboy” who lives in a remote cabin in Montana who had designed some kick-ass full range bass cabinets that readily reach down to a low F# and are lightweight to boot. The real kicker is that Greenboy, Dave Green, is also generous – he has made the Greenboy™ fEARful designs available, free of charge, to any home builder for personal use only. All of Greenboy’s fEARful designs use Eminence Kappalite 3012LF or 3015LF high excursion woofers paired with a midrange driver and an optional high frequency driver.

Choosing the Design
 The more I read, the more I became intrigued with the idea of possibly building one for myself, but which one? To answer this question, I went to the source: Designer Dave Green’s website: greenboy.us This website provided access to the fEARful™ design plans, links to authorized builders of Greenboy™ Audio products, lots of additional information and a link to the Greenboy/ fEARful™ users and builders forum. (Note: you may have to sign up and log-in to view)

I found the users and builders forum to be extremely useful and entertaining as I studied the various designs and read the posts provided by other builders on their DIY experiences. Many of the builders have posted detailed descriptions and photographs of their builds as well as posting their own questions and comments. After much review, I decided on the 12/6/1 cube which utilizes the 3012LF woofer, Alpha 6 midrange and ASD 1001 compression driver – all Eminence products. In order to simplify the process, I purchased a kit from Leland Crooks at Speaker Hardware that included all the drivers, crossover components and other parts necessary for construction. Speaker Hardware even offers a Flat Pack that includes all the lumber pre-cut, but I opted to purchase the plywood locally and cut my own. I also purchased Duratex paint, internal dampening foam and speaker grilles from Speaker Hardware at an additional cost.
The Build
I purchased some 1/2 inch Baltic birch plywood from a local supplier and made the cuts spelled out in the cutting diagram and parts list by Greenboy.
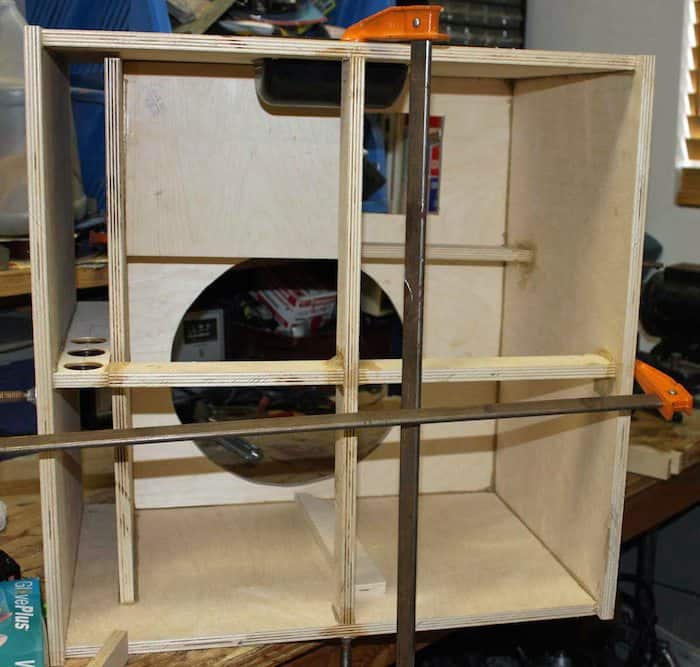
Here’s a photo of all the wood cuts:

I then started gluing and clamping the cabinet together. Greenboy is a big proponent of using PL Premium polyurethane construction adhesive to fasten everything together. In short, this stuff is amazing – it gives an incredibly strong bond and will fill any minor imperfections between the bonding surfaces. Big Hint: use gloves with this stuff – it will stick quite well to skin too!

After the cabinet was constructed, I painted it flat black with a can of spray paint and over coated it with Duratex – a super durable coating that is specifically designed for speaker cabinets. I just rolled the stuff on with the provided textured foam roller. I am not a skilled painter and I think it came out looking great – this stuff is pretty easy to use.

The next step was cutting up the foam and gluing it in using spray adhesive

It was now time to wire it all up. I opted to use pre-printed circuit boards provided by Speaker Hardware, where I just put the electronic components in the correct locations on the circuit board and soldered them in place. I also wired up the various drivers to the crossovers and to the speaker jack plate.

And here is the final product:

In Use
The cube weighs in at about 48 pounds and is small enough in dimensions that I can easily carry it with one hand. This makes it a real joy to load into a gig. It is also, without a doubt, the most versatile bass cabinet I have ever owned. At indoor gigs I can easily keep up with live drums, two fairly loud guitars, a keyboard and a full PA system – this is pretty impressive for a single 12 inch woofer paired with a 6 inch midrange driver.
There is so much presence in the midrange driver that I often have the HF compression driver turned off. Turning on the HF driver turns the 12/6/1 cube into a miniature F.OH. system. Just for grins, I hooked it up to a powered mixing board and fed it some music from my iPhone – it sounded just like any good PA would, faithfully reproducing the full spectrum of the instrumentation for a well balanced sound. Recognizing that these Greenboy™ designed enclosures are full spectrum cabinets is important when one first starts using one for bass. I find the midrange and even upper mid’s to be more forward on the 12/6/1 Cube, in comparison to my other cabinets, and I therefore adjust my amplifier EQ accordingly.
In Retrospect
I really enjoyed the process of building my own speaker cabinet. I have completed other DIY projects and they haven’t always given me this sense of fulfillment. I attribute my contentment to the following:
1. The Greenboy™ products are very well thought-out, meticulously documented designs using high quality components.
2. The owner and builders forum provides guidance, support and a sense of community. During my build, I had mistakenly glued in one of the internal braces in the wrong orientation. The folks on the forum were very thoughtful and kind in pointing this out and they offered a few different, very practical suggestions to remedy the problem.
3. The end product really sounds good.
As far as cost goes, I invested about $500.00 in the wood, components, paint, etc. and a few weeks worth of time total. It is not the cheapest way to go, but I feel I got a huge bang for the buck. The retail cost of a similar product is considerably higher.
If, after reading this brief account of my latest DIY adventure, you are fired up to break out the saws and screw drivers – be careful and have fun! If you feel the DIY route is not for you, but that you are interested in Greenboy™ designs – take heart, there are a few options for you. There is a list of authorized builders on the Greenboy website for both Greenboy’s fEARful and FEARLESS products.
In Closing
I would like to thank Dave Green (Greenboy) for his talent, time and generosity in making these designs available free-of-charge to the bass community. I would also like to give some brief shout-outs to Leland Crooks, of Speaker Hardware, for making sure I got all the right parts and Joseph Hawley, of JHawk Customs and Greenboy Audio – for taking the time at NAMM to introduce me to the Greenboy™ product line of fEARful and FEARLESS products. You can learn more about the speaker components listed in the article at Eminence.com.
Disclaimer: This pedal was kindly provided by Origin Effects for the purpose of this review. However, this does not influence our opinions or the content of our reviews. We strive to provide honest, unbiased, and accurate assessments to ensure that our readers receive truthful and helpful information.
There’s a certain kind of bass tone that doesn’t shout for attention, yet somehow defines the entire track. You hear it on records where everything just sits, where the low end feels effortless, supportive, and impossibly musical. It’s rarely about aggression. More often, it’s about control, warmth, and a sense that the instrument is breathing alongside the band.
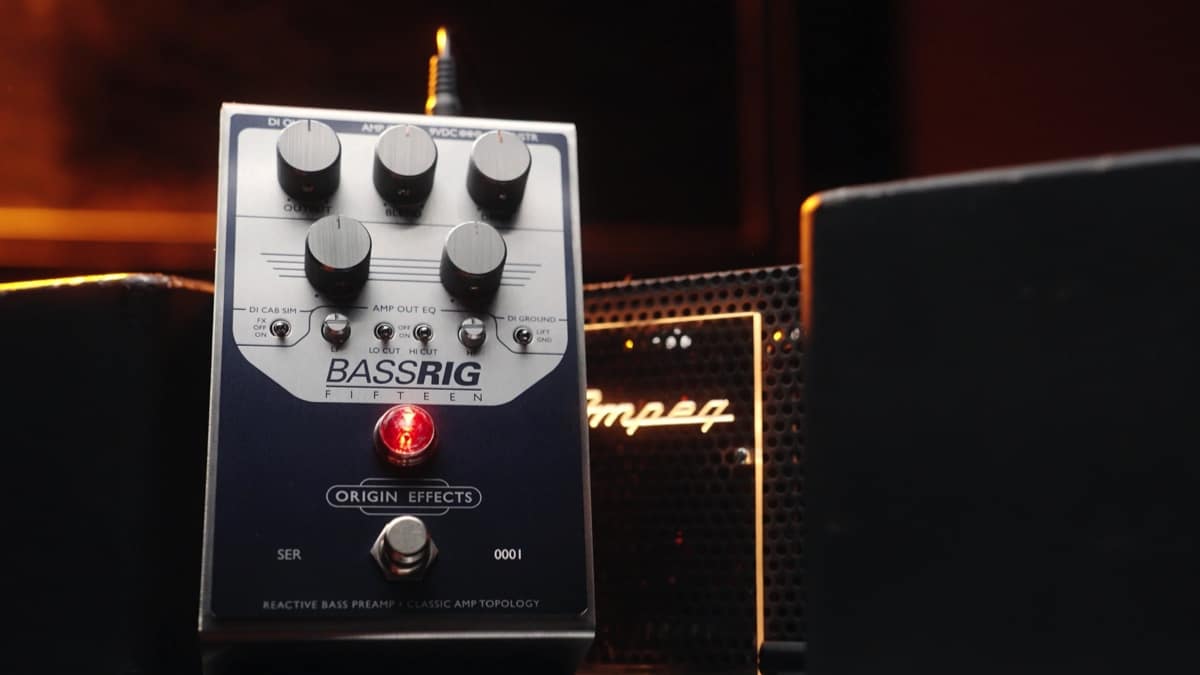
That’s the space the BassRig Fifteen occupies.
Origin Effects has built a reputation around precision gear that doesn’t just approximate vintage equipment, but attempts to understand it at a deeper level. With the BassRig Fifteen, they’ve turned their attention to one of the most recorded bass amp sounds in history and distilled it into a compact, all-analogue format.
But this isn’t a nostalgia piece. It’s a tool designed for modern players who need that sound without the complications that usually come with it.
From the first few notes, what stands out isn’t a specific frequency or EQ curve; it’s the way the pedal responds. There’s a softness to the transient, a subtle compression that feels organic rather than imposed. Notes bloom rather than snap, and even simple lines take on a sense of weight and intention.
It doesn’t behave like a typical pedal. In fact, thinking of it as an “effect” feels slightly misleading. The BassRig Fifteen is closer to a front-end, something that reshapes the entire way your instrument interacts with the rest of your signal chain.
Push it gently, and it rewards you with rounded, articulate lows and a smooth top end that never gets brittle. Dig in harder, and the texture thickens, introducing harmonic complexity without tipping into anything that feels overly saturated. It’s a very specific kind of drive, more studio saturation than stage distortion.
One of the most impressive aspects is how easy it is to maintain clarity. Bass players are used to compromise when adding gain, losing low-end definition, or watching their sound disappear in a mix. Here, that trade-off feels largely absent. The core of your tone remains intact, even as the character evolves around it.
This makes the pedal particularly compelling in recording scenarios. Plugging directly into an interface via the built-in DI yields a sound that already feels “finished.” There’s a natural sense of space and balance, as though a cabinet has already been carefully mic’d and placed. It doesn’t require much in the way of corrective EQ or additional processing to sit correctly.
Live, that same consistency becomes a different kind of advantage. Engineers get a predictable, mix-ready signal. Players get the reassurance that their tone isn’t being left to chance night after night.
What’s interesting is how restrained the whole experience feels. In an era where many pedals compete on extremes, more gain, more options, more everything, the BassRig Fifteen takes a narrower path. It focuses on doing one thing exceptionally well, and trusts that players will understand the value in that.
That doesn’t mean it’s limited. There’s enough flexibility to adapt to different instruments, playing styles, and rigs. But the boundaries are intentional. This isn’t about radically transforming your sound; it’s about refining it.
And that distinction matters.
For players chasing vintage-inspired tones, the appeal is obvious. But even outside of that world, there’s something to be said for a piece of gear that prioritises feel over spectacle. The BassRig Fifteen doesn’t demand attention; it earns it over time, through consistency and musicality.
It’s not the kind of pedal that reveals everything in the first five minutes. Instead, it gradually integrates itself into your playing, shaping your touch and subtly influencing how you approach the instrument.
In the end, that might be its greatest strength.
Because while there are plenty of pedals that can impress, far fewer can disappear into your sound in a way that makes you forget they’re even there.
Available online at Amazon.com
Disclaimer: This pedal was kindly provided by Donner Music for the purpose of this review. However, this does not influence our opinions or the content of our reviews. We strive to provide honest, unbiased, and accurate assessments to ensure that our readers receive truthful and helpful information.
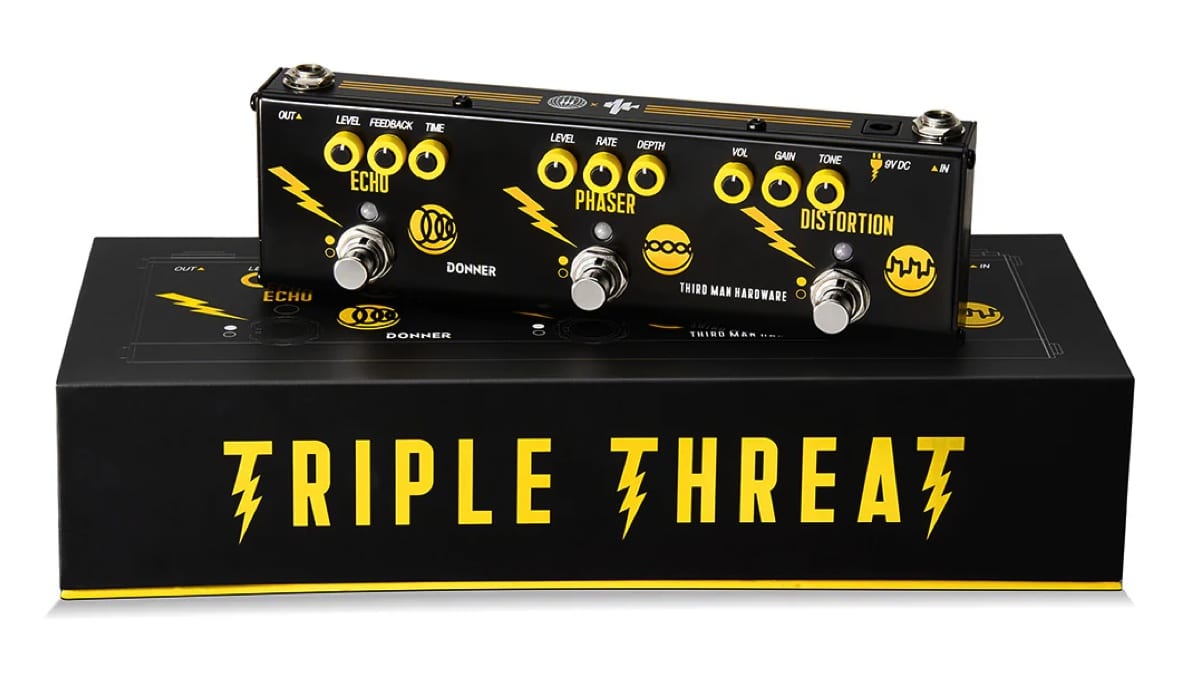
Triple Threat… A compact burst of analog attitude with unexpected appeal for bass players.
Multi-effects pedals are not usually the first stop for bassists. Most of us build our rigs piece by piece, choosing pedals that preserve low end and offer precise control. The Donner Triple Threat Pedal, created in collaboration with Jack White’s Third Man Hardware, takes a very different approach. It keeps things simple: distortion, phaser, and echo, all in one compact unit, with no menus or deep editing, just knobs and footswitches.
At first glance, it feels like a guitar pedal through and through. But spend a little time with it on bass, and it starts to reveal a different kind of usefulness, less about precision, more about character.
Built around simplicity
The Triple Threat is all about immediacy. Each effect has its own dedicated controls and footswitch, making it easy to dial in sounds quickly without overthinking the process. There’s something refreshing about plugging in and getting straight to experimenting, especially for bass players who are used to more complex signal chains.
The compact enclosure makes it easy to fit onto almost any pedalboard or even use as a standalone unit for rehearsals and smaller gigs. That said, the small size does mean the knobs are quite tight and not the easiest to adjust mid-performance. It’s a minor compromise, but one that becomes noticeable on a dark stage.
Analog character
Rather than aiming for clean, studio-like tones, the Triple Threat leans into a more raw and expressive sound. This becomes particularly apparent in the distortion section. It delivers a gritty, garage-inspired voice that can add real personality to a bass line, especially in indie or lo-fi contexts.
On bass, the key is restraint. Lower gain settings bring out a nice edge without sacrificing too much low end, while higher settings can start to thin things out. Without a blend control, there’s no easy way to bring back the fundamentals once it’s gone, so it rewards a lighter touch.
The phaser is more immediately cooperative. With slower rates and moderate depth, it adds movement without overwhelming the core tone. It’s the kind of effect that works best when you don’t notice it right away, but feel it sitting underneath the groove.
The echo section stands out as the most naturally suited for bass. It’s warm, slightly dark repeats sit comfortably behind the dry signal, adding space without clutter. Whether used subtly or pushed into more ambient territory, it complements the instrument rather than competing with it.
Real-world perspective
The Triple Threat has also found its way onto the pedalboard of Dominic John Davis, bass player for Jack White, which gives some insight into how it functions in a professional setting.
Looking at his broader setup, typically including tools like the Boss TU-3 Chromatic Tuner, MXR M108 Ten Band Graphic EQ, and boutique pedals such as the Mantic Effects Vitriol and Mantic Effects Isaiah Delay, it becomes clear that the Triple Threat isn’t a centerpiece. Instead, it serves as a flexible addition, a way to access a few extra textures without expanding the pedalboard further.
That context is important. For bass players, this isn’t about replacing carefully chosen pedals, but about adding something a little different to the mix.
Versatility in practice
In practical use, the strength of the Triple Threat lies in how quickly it lets you shift between sounds. Having three effects available at your feet without needing multiple pedals can be surprisingly useful, especially in stripped-down setups.
It’s easy to imagine it being used in rehearsals, smaller gigs, or situations where portability matters. It also lends itself well to experimentation, encouraging players to step outside their usual tonal comfort zones.
At the same time, its limitations remain part of the experience. The distortion’s guitar-oriented voicing and the absence of a blend control mean it won’t satisfy players looking for a fully optimized bass overdrive. Instead, it offers something a bit less predictable, and that’s part of its charm.
The Donner Triple Threat Pedal isn’t trying to be a precision tool, and it doesn’t need to be. What it offers is a straightforward, character-driven set of effects that invite exploration.
For bass players willing to approach it on those terms, it can be a surprisingly inspiring addition. It won’t replace a dedicated pedalboard, but it can add texture, movement, and a bit of unpredictability in a way that feels immediate and fun.
For more information, visit online at donnermusic.com
Disclaimer: This pedal was kindly provided by Valeton for the purpose of this review. However, this does not influence our opinions or the content of our reviews. We strive to provide honest, unbiased, and accurate assessments to ensure that our readers receive truthful and helpful information.
Two Paths to the Same Goal: Better Workflow, Real Control
Valeton’s GP series has followed a clear and consistent trajectory. The GP-5 introduced the core sound engine in an ultra-compact, app-driven format, proving that solid tones could exist in a minimal footprint, but at the cost of hands-on control. The GP-50 took a major step forward by adding onboard editing and a second footswitch, making the platform far more usable without relying on external devices.
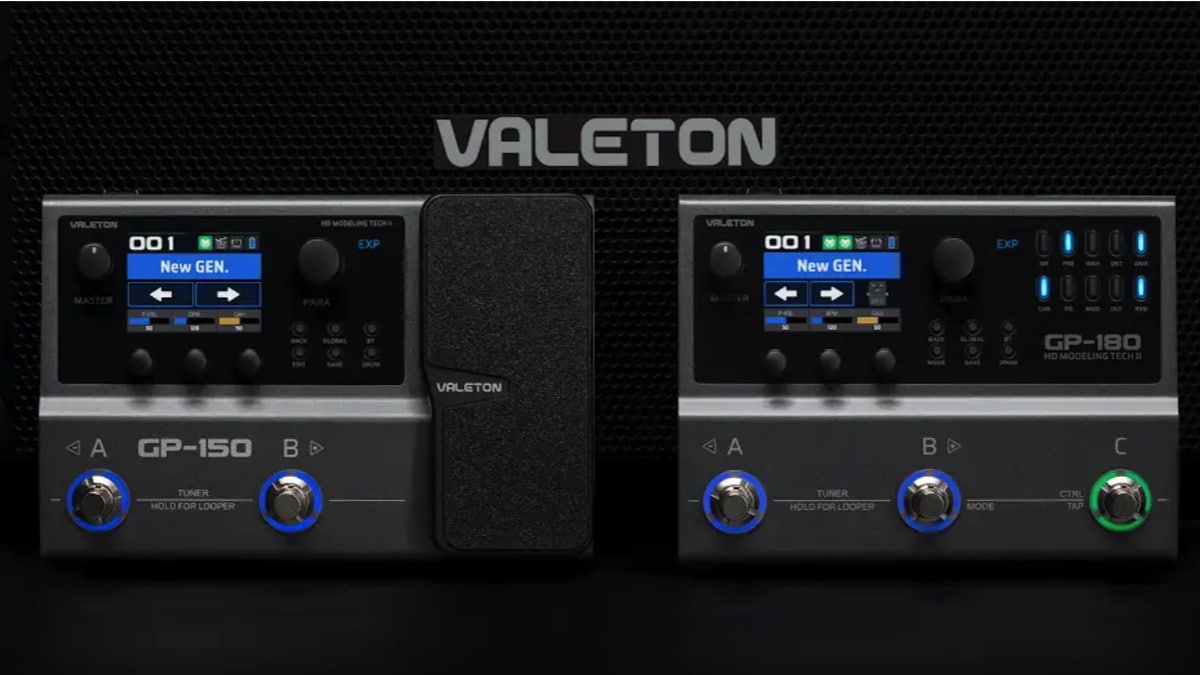
With the GP-150 and GP-180, Valeton shifts the focus again, this time toward how players actually interact with their sound while playing.
These aren’t about reinventing the tone engine. They’re about making it more accessible, more flexible, and ultimately more musical in real-world use.
It’s also worth noting that while these pedals build on workflow ideas introduced in smaller GP units like the GP-5 and GP-50, the GP-150 and GP-180 are more closely related to the GP-100 platform, positioned as more complete, floorboard-style solutions rather than compact multi FX.
The Big Picture
Both the GP-150 and GP-180 share the same core foundation:
- 200+ effects
- NAM (Neural Amp Modeler) support
- IR loading (up to 20 files)
- 12-module fully flexible signal chain
- Looper (180 seconds) and drum machine
- USB audio interface and Bluetooth connectivity
- Built-in rechargeable battery
So in terms of sound and raw capability, they’re very similar.
The real difference comes down to workflow and control.
GP-150: Compact Rig with Real Expression

The GP-150 is where the platform starts to feel like a proper, self-contained rig.
The standout feature here is the built-in expression pedal. That alone changes how you use the unit. Instead of just switching presets or toggling effects, you can actively shape your sound in real time… volume swells, wah, parameter control… it’s all immediately available.
Combined with dual footswitches and onboard editing, the GP-150 strikes a strong balance
between portability and control. It carries forward the independence introduced in the GP-50,
but expands it into something more expressive and complete.
It’s especially appealing for players who want a minimal setup that still feels dynamic and
responsive.
GP-180: Hands-On Control, Pedalboard Feel

The GP-180 takes a different approach. Instead of adding expression, it doubles down on direct
control.
The addition of a third footswitch already makes navigation more natural, but the real shift
comes from the dedicated effect block buttons.
Each block has its own button, which lights up when active and can be toggled instantly. That
means you can turn distortion, delay, modulation, or reverb on and off with a single press—no
menu diving, no reassignment needed.
In practice, this makes the GP-180 feel much closer to a traditional pedalboard. You’re not just
switching presets, you’re interacting directly with your signal chain, something that wasn’t really possible with the more minimal GP-5 or even the GP-50.
For live use, that immediacy makes a big difference.
Tone & Real-World Use
Both units share the same sound engine lineage, and overall quality remains strong.
There are more effects available compared to earlier models, and the addition of NAM support
opens the door to more realistic amp tones and modern workflows.
One of the most noticeable improvements, particularly for bass players, is the octave tracking. Lower octave sounds are significantly tighter and more usable than in earlier GP units like the GP-5, making them far more practical in a mix. Higher octaves still feel a bit clunky, but the improvement where it matters most is clear.
In terms of real-world use, both pedals are flexible enough to cover practice, recording via USB, direct-to-PA live setups, and compact fly rigs.
That said, they cater to slightly different players.
Which One Should You Choose?
Go for the GP-150 if:
- You want a compact, all-in-one unit
- Expression control is important to your playing
- You prefer a streamlined setup with minimal footprint
Go for the GP-180 if:
- You play live and need faster, more direct control
- You prefer a pedalboard-style workflow
- You want to toggle effects individually rather than relying on presets
The GP-150 and GP-180 aren’t competing pedals; they’re two different interpretations of the same idea.
The GP-150 focuses on expression and portability, giving you a compact rig that still feels
dynamic and interactive, something that builds directly on the usability improvements
introduced after the GP-5.
The GP-180 focuses on control and immediacy, turning the GP platform into something that
feels much closer to a traditional pedalboard.
Both share the same solid tonal foundation, but they approach usability in different ways.
And that’s really what this generation of the GP series is about, not just sounding good, but
feeling right under your hands and feet.
Visit online at valeton.net/

Disclaimer: This bass strap was kindly provided by Italia Leather Straps for the purpose of this review. However, this does not influence our opinions or the content of our reviews. We strive to provide honest, unbiased, and accurate assessments to ensure that our readers receive truthful and helpful information.
I’ve spent years searching for the perfect wide bass strap, something that delivers both comfort and durability without compromising on style. That search ended nearly two decades ago when I discovered Italia Leather Straps.
Handcrafted in the USA from premium Italian leather, Italia Straps offers an impressive range of straps for both bass and guitar players. What immediately stood out to me was the exceptional craftsmanship; every detail, from stitching to material selection, reflects a commitment to quality. These aren’t just accessories… they’re long-term investments for serious musicians.
After more than 19 years of consistent use with my original strap, I can confidently speak to its longevity and comfort. Even under the demands of extended performances, the support provided by a 4” wide strap makes a noticeable difference.
In this review, I’m taking a closer look at the 4” Elite Series Leather Backed Bass Strap, now available in a sleek new Slate Black finish. It’s a refined addition to an already outstanding lineup, combining aesthetic appeal with the same trusted performance.
For more information, visit www.italiastraps.com.
Disclaimer: This pedal was kindly provided by Empress Effects for the purpose of this review. However, this does not influence our opinions or the content of our reviews. We strive to provide honest, unbiased, and accurate assessments to ensure that our readers receive truthful and helpful information.
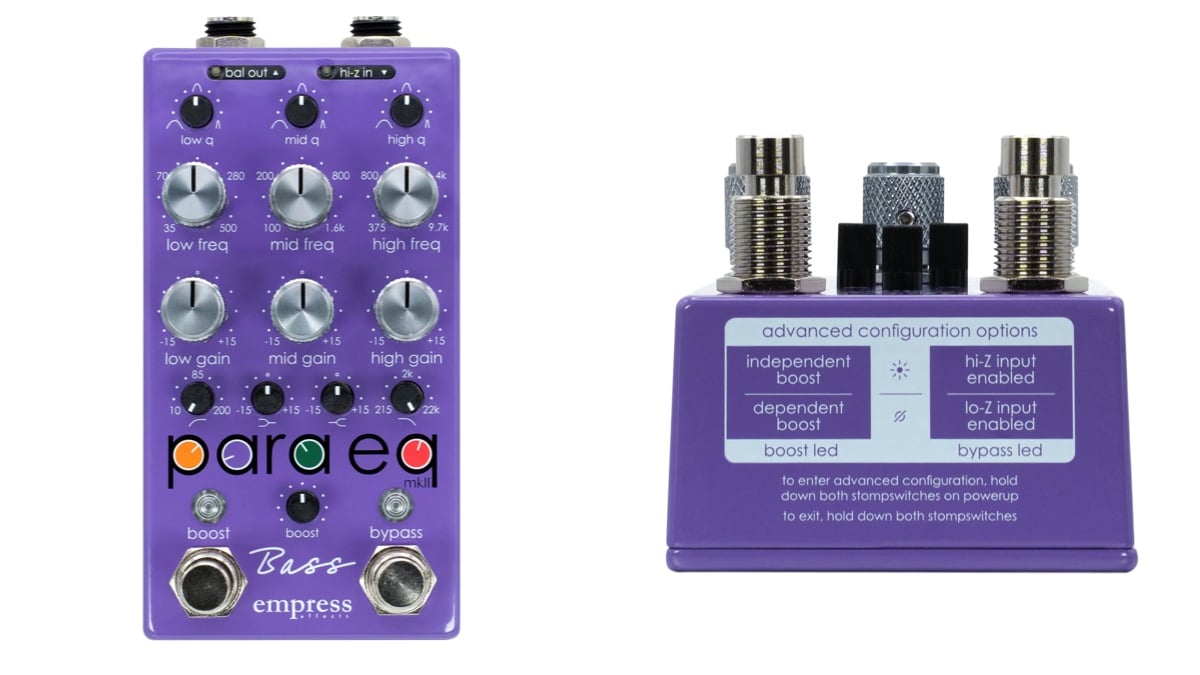
ParaEQ… Precision tone shaping in a pedalboard-friendly format.
EQ pedals are often the unsung heroes of a bass rig. While overdrives and compressors tend to get most of the attention, a good EQ can completely transform how a bass sits in a mix. The Empress Effects Bass ParaEQ takes that idea much further, offering studio-style tone shaping in a rugged pedal designed specifically for bass players.
Based on the company’s well-known ParaEQ MKII Deluxe, the Bass ParaEQ adapts the concept for low-frequency instruments, delivering a powerful and flexible tool for dialing in everything from subtle tonal tweaks to major corrective EQ.
Built for bass
At its core, the Bass ParaEQ is a three-band parametric equalizer, meaning each band allows you to select the frequency you want to adjust, how much you want to boost or cut it, and how wide the adjustment should be. For bass players, this level of control can make a huge difference when trying to solve real-world tone problems.
In addition to the three parametric bands, the pedal includes a low-shelf and high-shelf EQ, along with high-pass and low-pass filters. Together, these controls allow you to shape everything from deep sub-bass to the upper harmonics of the instrument.
The controls are laid out clearly on the pedal, and while there are quite a few knobs, the layout remains intuitive once you spend a little time with it. Each parametric band offers frequency selection, boost or cut of up to ±15 dB, and a Q control that adjusts the bandwidth of the EQ band.
Another thoughtful feature is the selectable input impedance. The standard 1M? input works perfectly with most electric basses, while a 10M? high-impedance mode is available for instruments with piezo pickups, making the pedal particularly useful for upright bass players.
Massive headroom and clean performance
One of the technical highlights of the Bass ParaEQ is its 27-volt internal operation. Although the pedal runs on a standard 9-volt power supply, the internal circuitry steps that voltage up to 27 volts, providing enormous headroom. In practical terms, this means the pedal remains exceptionally clean even when applying large EQ boosts.
This extra headroom is especially noticeable when boosting low frequencies, where many EQ pedals can start to sound strained or compressed. The Bass ParaEQ handles these boosts effortlessly, maintaining clarity and punch across the entire frequency range.
The pedal also includes a foot-switchable boost capable of delivering up to 30 dB of clean level increase. This feature turns the ParaEQ into more than just a tone-shaping tool. It can also function as a volume boost for solos, a way to match output levels between instruments, or even a clean gain stage to push an amplifier slightly harder.
Real-world performance
In real-world playing situations, the Bass ParaEQ quickly proves its value. One of its biggest strengths is how easily it can adapt to different instruments and environments.
For example, during a recent gig, I used the pedal while switching between an active Jazz bass and a passive bass with flatwound strings. The active bass had a fairly aggressive top end that tended to jump out in the mix. With the ParaEQ, it was easy to smooth that out by slightly trimming the upper mids and rolling off some of the extreme highs.
The passive bass, on the other hand, benefited from a small boost in the presence range, helping it cut through the band without losing its warm character. Instead of constantly adjusting the amp between songs, the ParaEQ handled those changes instantly.
The pedal is equally useful for addressing common live sound issues. A quick adjustment can tighten up muddy low mids, add clarity to a dull stage tone, or remove problematic resonances that appear in certain venues.
Versatility for stage and studio
While the Bass ParaEQ is incredibly useful in live settings, it also shines in the studio. Engineers frequently use parametric EQ to shape bass tones during mixing, and having this level of control directly on the pedalboard allows players to dial in a more refined sound before the signal even reaches the recording chain.
The combination of parametric bands, shelving filters, and high-pass and low-pass filters makes the pedal capable of handling a wide range of tonal adjustments. Whether the goal is tightening the low end, adding articulation, or smoothing out harsh frequencies, the ParaEQ delivers precise results without altering the natural character of the instrument.
Final thoughts
The Empress Effects Bass ParaEQ is not your typical EQ pedal. With its parametric controls, extensive filtering options, and massive internal headroom, it offers a level of precision more commonly found in studio equipment than on a pedalboard.
For bassists who want deeper control over their tone—or simply a reliable way to handle the tonal challenges of different rooms, instruments, and mixes—the Bass ParaEQ is an incredibly powerful tool. It may require a little more understanding than a simple three-band EQ, but the payoff in flexibility and sound quality makes it one of the most capable EQ pedals available today.
Visit online at empresseffects.com/

Gear News: Fender Unveils Highly Anticipated Vintera III Series

New Music: Oteil Burbridge & Lamar Williams Jr. New Single, Hush

Interview With Bassist Virginia Franks

Nathan East, Echoes of a Lineage – April/May 2026 Issue

Gear Review: Italia Leather Straps

Feb 23 Edition – This Week’s Top 10 Basses on Instagram
Mar 2 Edition – This Week’s Top 10 Basses on Instagram
Mar 9 Edition – This Week’s Top 10 Basses on Instagram
Mar 16 Edition – This Week’s Top 10 Basses on Instagram